End-user Concepts
FileCatalyst Workflow centers around the creation of "jobs". A "job" simply
means the combination of assets (your files) with metadata (information collected
by a form). The administrator is able to set up any number of different forms,
and the successful completion of a form along with an upload creates a new "job".
Jobs fall broadly into two different categories: submission and distribution.
A "submission" job has the files being sent to the company owning this web portal,
where they will be further processed. A "distribution" job allows the user to
overcome the limitations of email attachments by distributing download links to
any recipient with an email address. The assets themselves are centrally stored
and then retrieved via the distributed link.
In addition, users of a FileCatalyst system may have a File Area for storing,
sending, and retrieving their assets via the web portal. Optionally "File Area - Request Files Here"
can be used to request files into a specific folder within a File Area.
Submitting a Job
- Select "New Job". If you have multiple forms available, choose the one intended
for submission. This is often called simply "default," although each system may
have different forms with different names. If there is no field for entering
arbitrary email addresses, you are creating a submission job.
- Fill out the required fields.
- Choose "upload files". Using the file transfer tool that appears, select
and send the files related to this job.
- Depending on configuration, the job may complete automatically, or you may
be asked if you would like to add more files or information to the job.
- Depending on configuration, you may be asked to fill out a "per file" form.
Per file form will allow you to input special information for each file you uploaded.
See Edit File Properties for more information.
- Select "View Jobs". You will see a newly-created job with a unique ID. You
may review the details of the job at any time.
Distributing Assets
- Select "New Job". If multiple forms are
available, select an appropriate form, often called simply "Distribution".
If the system is configured with a single distribution form, you will automatically
go to the upload page with no form selection drop down.
- Fill out the required fields. One required field will always be for one
or more email addresses. An address book is available to store frequently-used
contacts.
- Choose "upload files". Using the file transfer tool that appears, select
and send the files related to this Job.
- Depending on configuration, the Job may complete automatically, or you may
be asked if you would like to add more files or information to the Job.
- Select "View Jobs". You will see a newly-created
Job with a unique ID. You
may review the details of the Job at any time.
File Area
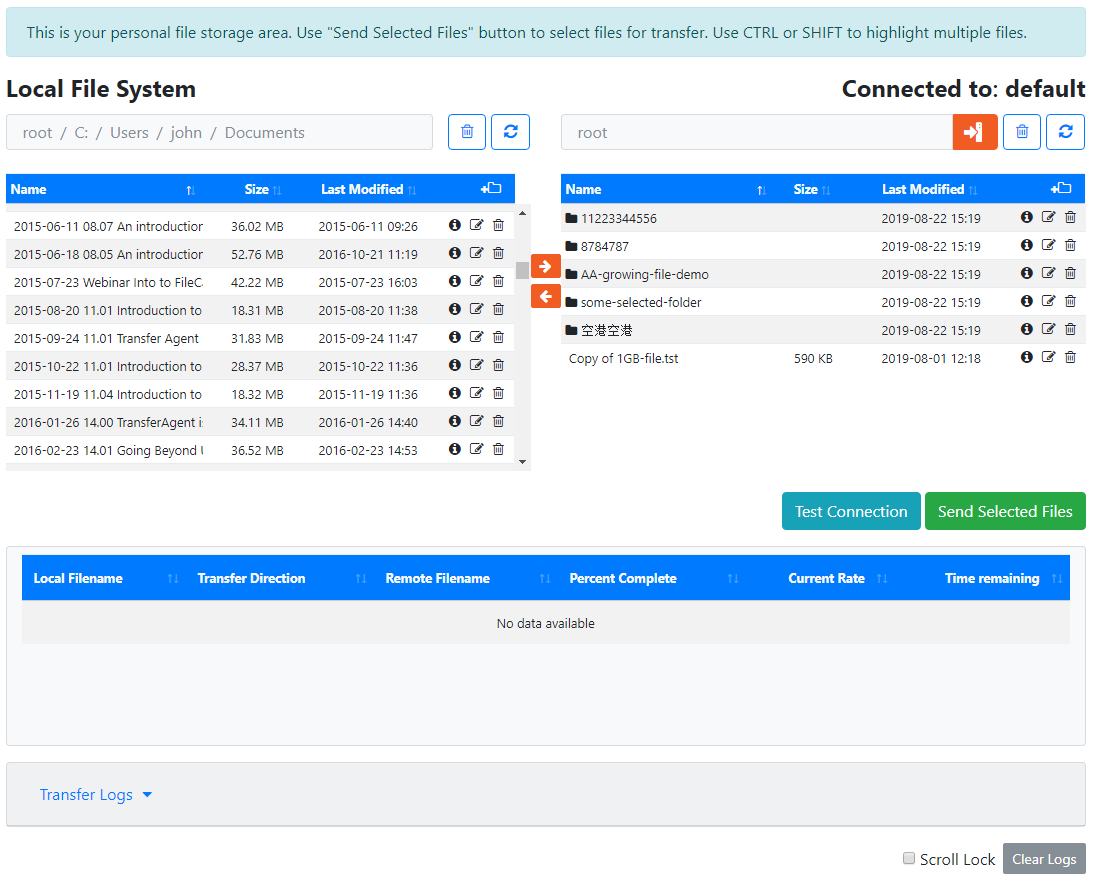
Users may have personal and/or group file storage areas. Files in this area are available
anywhere in the world with Internet access and a browser. File Area is a general web based folder to store and share files online.
If your account is configured for this feature, you will see "File Area" option in the main menu.
Only system administrators can create file area and assign end users to the File Area.
If you have access to multiple File Areas a drop down to select a given File Area will appear.
Group File Areas will provide an option to "Review Recent Changes" for the selected group. Recent changes will track and show any
file/folder modifications including the date, type of operation and the username.
Any files moved in and out of the file area do not create new Jobs, though you may
select files from the area to initiate that process.
For more information on the file area, please see the File Area
help page
File Area - Request Files Here
This feature must be enabled, configured and assigned to you (the end user) by the system administrator.
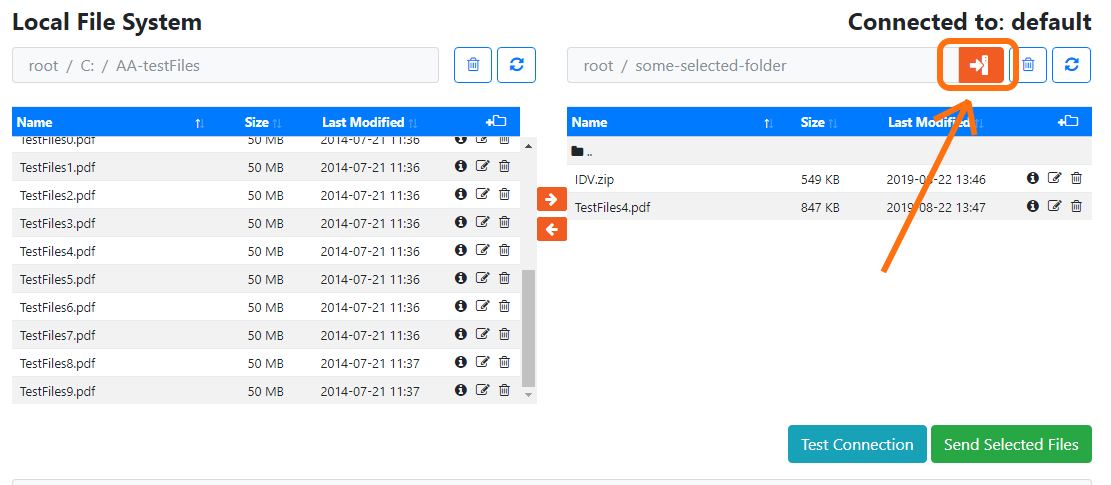
Request Files Here allows you to browse the contents of any File Area and request files to be uploaded to the chosen directory in the File Area.
By clicking on
"Request Files Here" icon
located to the left of the remote directory path, you can request files to be uploaded directly into the chosen file area folder.
You will have to provide the email address of the person you wish to receive files from and
FileCatalyst Workflow will send an email containing the
invitation tracking number to the uploader. The person you wish to receive files from will just have to click on the link
provided in the email, optionally enter a password to access the upload page and commence uploading files into the given directory
either via Form Upload or via Transfer Agent.
The entire upload via "Request Files Here" is stored as a new Job in FileCatalyst Workflow for further tracking.
Request Files Here icon will only appear for Group File Areas with Upload permission enabled.
Whenever a person requested to upload to a given Group File Area uploads files, all the member of the the given group will be notified via email,
if group email notification is turned for the given group. Email notification for the Group File Area can only be turned on by the system administrator.