System Requirements
On the end user side, FileCatalyst TransferAgent was designed to run on a multitude of operating systems and hardware configurations. Below are the minimum requirements:
- Dual Core processor, 2GB RAM, 80MB of free disk space
- Windows 10, macOS 10.14 or higher, 64-bit
- Recent web browser: Safari (macOS only), Chrome, Firefox, Edge
- Broadband Internet connection
- Network connectivity to FileCatalyst Direct Server (third party FTP servers are not supported)
Download the Installer
The organization hosting the FileCatalyst-enabled file transfer page will provide a link to a version of FileCatalyst TransferAgent, typically but not always from the same dialog used to access this guide.
Once the browser has completed downloading the installer, it will usually
ask if you would like to run it. If not, you must go to your download
location and execute the file installer_fc_transferagent.exe.
Installer Wizard
Install Mode Selection
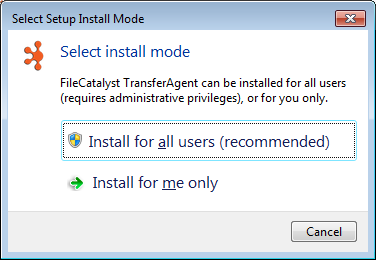
If you do not have administrative level permissions, you will be given the option to install for all users or just for yourself. If you choose to install for all users, you will be asked to enter an administrator password to continue.
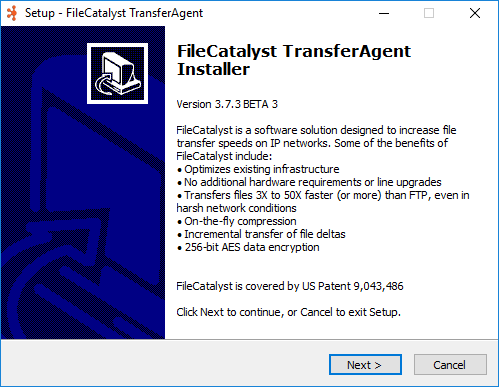
Information
On this first screen of the installer, you will be introduced to information about our products. If you are ready to install TransferAgent, click on the next button.
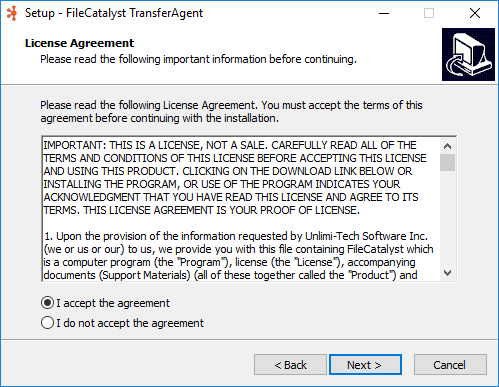
License
To proceed, you must accept the terms of the license.
Location
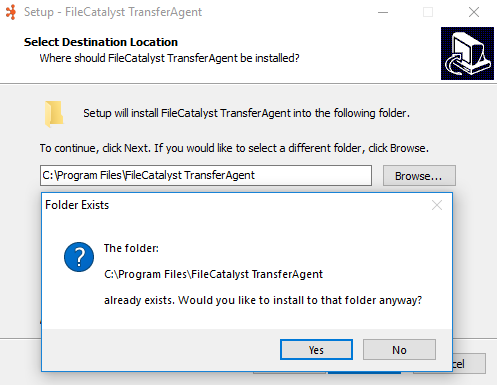
After agreeing to our license and clicking next, you will be given the opportunity to set the install location.
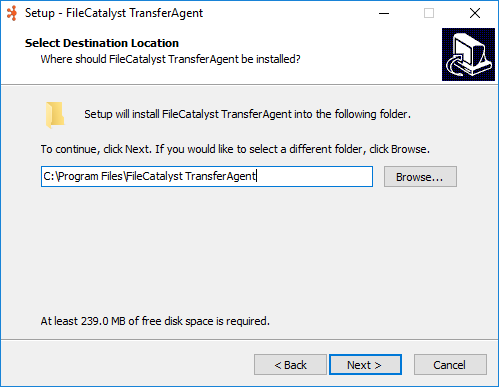
If this location does not exist, you will be asked for permission to create it. Otherwise, you will be warned that some of your existing files may be overwritten.
Installer Mode
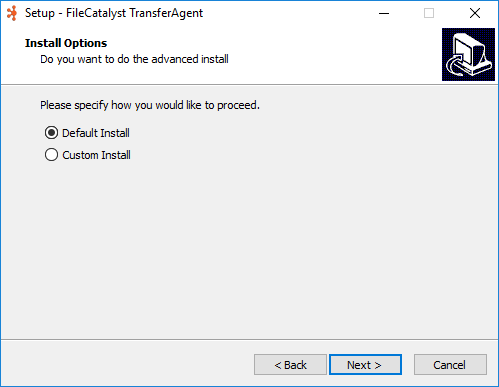
This will give you the option to select an installation mode for the TransferAgent. The available ways of installation are as follows:
- Basic installation: This mode is for individuals that don't require custom configurations for their installations. By selecting this mode, TransferAgent will install with the default configurations that satisfy most use cases.
- Custom installation: This mode is for individuals that may require special configurations for their installations. By selecting this mode, TransferAgent will present a set of optional panels that allow for custom configurations to be supplied.
Advanced Configurations
If the Custom Installation mode was specified during the installation process, multiple areas for specifying configurations will be presented. In these areas, you may specify configurations for the TransferAgent HTTP port, download directory, and Central management configurations.
HTTP Port
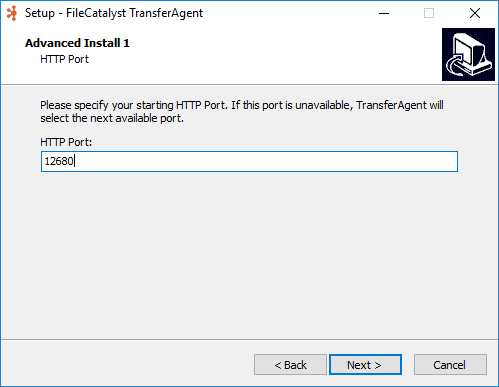
- HTTP Port: The port that will be used when TransferAgent launches it's internal web server.
Download Location
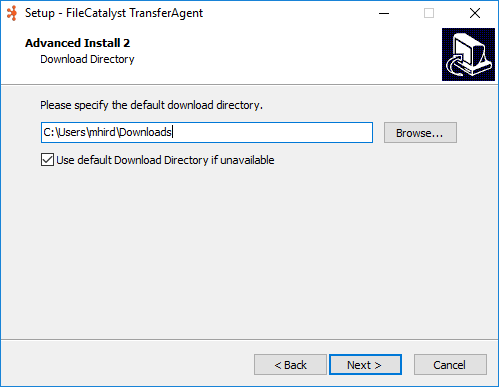
- Download Directory: Where the TransferAgent will download files to.
- Use default Download Directory if unavailable: If selected, the TransferAgent will migrate the download location to the default location if it cannot be accessed or does not exist.
Central Management
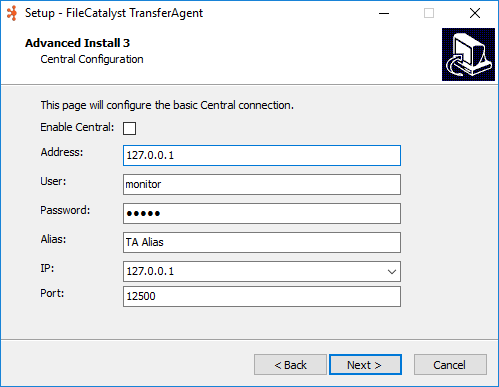
- Enable Central: Allow TransferAgent to share statistics with and be controlled by FileCatalyst Central. Enabling this option will also recommend installing FileCatalyst TransferAgent as a system service.
- Address: The address (IP or hostname) of FileCatalyst Central.
- Username: The username needed to log into FileCatalyst Central and register TransferAgent for monitoring.
- Password: The password needed to log into FileCatalyst Central and register TransferAgent for monitoring.
- Alias: A name of your (or your administrator's) choosing, which will allow FileCatalyst Central administrators to easily identify your TransferAgent.
- TransferAgent IP: The IP or domain name of this instance of the FileCatalyst TransferAgent. Use of domain name names is recommended.
- Port: The port at which FileCatalyst Central is found.
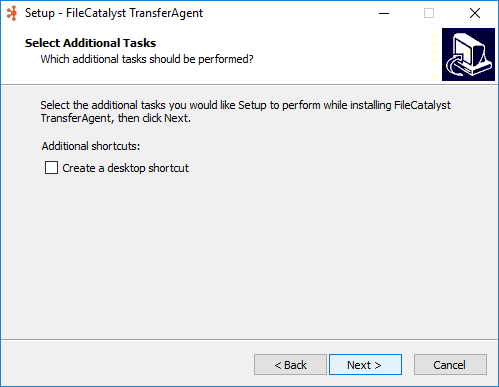
Shortcuts
After the installation mode has been selected and completed, the installer will move to the creation of shortcuts.
Summary
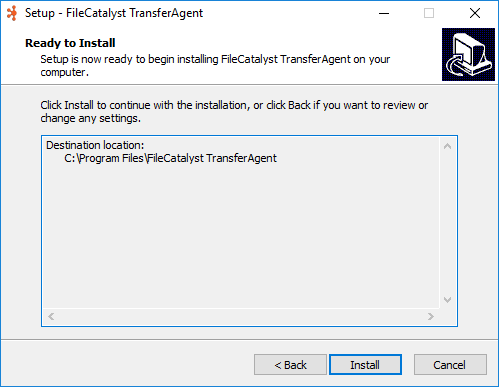
After the shortcuts have been specified, the installer will present a summary of the processes that will be performed during the installation process.
Install Files to Hard Drive
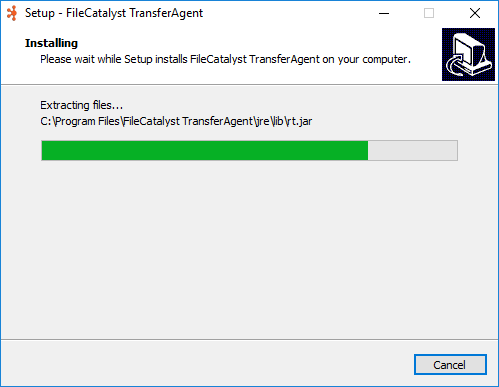
Continuing will install the files on your hard drive.
Finalize Installation
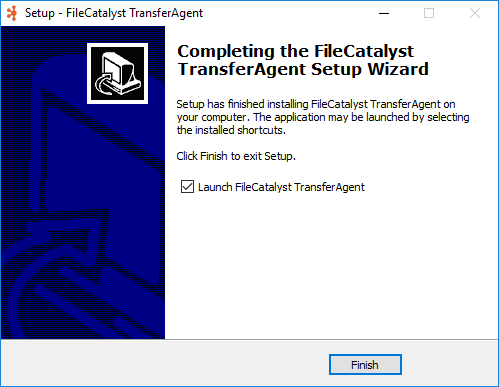
After all of the files have successfully extracted onto your hard drive, the installer is finished. If you wish to launch the TransferAgent after the installer fully completes, select the Launch FileCatalyst TransferAgent option, then click on Finish.
Upgrading the TransferAgent Application
Upgrading FileCatalyst TransferAgent requires a sequence of steps be taken based on the installation platform. Some steps are optional (to safeguard configuration data in case of a rollback), but should be followed to ensure the smoothest upgrade experience.
- Stop the TransferAgent.
If you are running FileCatalyst TransferAgent stand-alone (from "Start" menu), please right-click on the tray icon and select the bottom menu item.
If you are running the TransferAgent as a service, please open up the Windows Services and stop the process from running (default name is "FileCatalyst TransferAgent"). - Backup configuration files.
If upgrading from v3.6 or less, you should copy the following configuration files into an "upgrade" folder.- fcta.conf
- origins.json
If upgrading from v3.7 or greater, you should also copy the following configuration files into an "upgrade" folder.- sites.json
- tawrapper.conf
- www/express-src/js/config.js
- Run the installer (install_fc_transferagent.exe).
- Terminate the TransferAgent instance that started during the installer.
- Copy back all of the files that you moved during step 2
- Restart the FileCatalyst TransferAgent application (either as a service or standalone).
Uninstalling the FileCatalyst TransferAgent Application
Uninstall Steps
- If you are running FileCatalyst TransferAgent stand-alone, find the TransferAgent tray icon, right-click, and select the "Exit FileCatalyst TransferAgent" option at the bottom of the menu options.
- If you are running TransferAgent as a service, click on 'Start', search for services.msc, and then run that application
- Find the TransferAgent service and stop it
- Open ‘Control Panel’, navigate to ‘Programs and Features’, and locate FileCatalyst TransferAgent.
- Click ‘uninstall’ and click the 'yes' option when prompted
Silent Install and Uninstall of the FileCatalyst TransferAgent Application
The FileCatalyst TransferAgent installer and uninstaller can be configured to run as a silent install.
Silent Install Steps
- To generate the settings file,run the installer from the command with the SAVEINF flag and the
destination file for the settings:
install_fc_transferagent.exe /SAVEINF="C:\path\to\settings\settings.inf" - Copy the installer and the generated file to the machine where you would like to perform the silent install.
- Run the installer from the command line with LOADIINF flag and the full path of the settings
file. Use /CURRENTUSER instad of /ALLUSERS if you only want to install for the current user:
install_fc_transferagent.exe /ALLUSERS /VERYSILENT /LOADINF="C:\path\to\settings\settings.inf"
Silent Uninstall Step
- Open a command prompt and navigate to the install directory of the product you wish to uninstall.
- Run the uninstaller from the command line with the VERYSILENT flag:
unins000.exe /VERYSILENT - Note that if you have installed multiple versions in this directory, the number at the end of the exe may have been incremented
